- http://en.wikipedia.org/wiki/Aspect-oriented_programming
- http://goo.gl/RoDyP
ใช้ windows(7) 64 bits รัน toad 32 bits (ver 10)
แล้วสร้าง connection จะเจอ ORA-06413 Connection not open.
แต่ toad ver 9 ใช้ได้ เลยค้นดูสาเหตุเกิดจากอะไร
ที่น่าสงสัยคือ C:\Program Files (x86)\Quest Software\Toad for Oracle\
เพราะ software เป็น 32 bits windows จึง default ให้ที่ Program Files (x86)
ปัญหาเลยอยู่ที่ วงเล็บ()
วิธีแก้ คือ uninstall แล้วลงใหม่ โดยไม่ให้มี วงเล็บ หรือ parenthesis อยู่ในชื่อ directory ด้วย
อันข้างล่างเป็นข้อมูลที่หามา
อีกวิธี
Installation:
Windows 64-bit Operating System - Oracle Client Issue
แล้วสร้าง connection จะเจอ ORA-06413 Connection not open.
แต่ toad ver 9 ใช้ได้ เลยค้นดูสาเหตุเกิดจากอะไร
ที่น่าสงสัยคือ C:\Program Files (x86)\Quest Software\Toad for Oracle\
เพราะ software เป็น 32 bits windows จึง default ให้ที่ Program Files (x86)
ปัญหาเลยอยู่ที่ วงเล็บ()
วิธีแก้ คือ uninstall แล้วลงใหม่ โดยไม่ให้มี วงเล็บ หรือ parenthesis อยู่ในชื่อ directory ด้วย
อันข้างล่างเป็นข้อมูลที่หามา
Just install TOAD in c:\Programs\TOAD instead of the default directory (avoid any parenthesis or spaces in the folder) and IT WILL WORK! Ask no questions, just work.
I found this document on Oracle Metalink:
Subject: ORA-12154 or ORA-6413 Running 32-bit Oracle Software on 64-bit Windows OS
Doc ID: Note:334528.1
SymptomsYou are attempting to connect to the Oracle database from a Windows platform using one of the following programmatic interfaces
ODBC
OLEDB
OO4O
ODP.NET
after installing 32-bit Oracle client software on a 64-bit Windows operating system (OS) you receive one of the following errors:
ORA-12154: TNS:could not resolve the connect identifier specified
or
ORA-6413: Connection not open. Cause64-bit Microsoft OS's install 32-bit applications into the following location"C:\Program Files (x86)\..."
rather than the typical location of
"C:\Program Files\..."
This causes an existing networking bug to occur where the networking layer is unable to parse program locations that contain parenthesis in the path to the executable which is attempting to connect to Oracle.
The following bug has been filed to correct this behavior:
Bug 3807408 - CANNOT EXTERNALLY AUTHENTICATE USER WITH QUOTE IN USERNAMEAdditional Information
The reason you receive an ORA-12154 vs. an ORA-6413 is generally due to which programmatic interface you have chosen to use to connect to Oracle.
The ORA-12154 is the typical error seen when connecting with up-to-date interfaces using the latest version of the Oracle Call Interface (OCI):
Oracle ODBC Driver
Oracle Provider for OLE DB
Oracle Objects for OLE
Oracle Data Provider for .NET (ODP.NET)
Microsoft's .NET Managed Provider for Oracle
The ORA-6413 is typical of using older interfaces which make legacy API calls such as Oracle's OCI Version 7 API:
Microsoft ODBC Driver for Oracle
Microsoft OLE DB Provider for Oracle
SolutionTo resolve this problem try either of the following solutions:
SOLUTION 1:
Use a version of the Oracle software that contains the fix for Bug 3807408.
NOTE: Currently the following patches have been released on Windows:
Windows 32-bit
9.2.0.7.0 Patch 6: Apply Patch 4928723 or later
10.2.0.1.0 Patch 4: Apply Patch 4923768 or later
10.2.0.2.0 Patch 5: Apply Patch 5383042 or later
10.2.0.3.0: Apply Patch 5337014 or later
Windows 64-bit AMD64 and INTEL EM64T
10.2.0.1.0 Patch 4: Apply Patch 4923787 or later
10.2.0.2.0 Patch 5: Apply Patch 5388871 or later
10.2.0.3.0: Apply Patch 5337014 or later
For all other versions on Windows please use SOLUTION 2 for now.
SOLUTION 2:
Find the location of the application that is generating the error. Check the path to this location and see if it contains any parenthesis. If so, you must relocate the application to a directory without any parenthesis in the path.
----
In my sqlnet.log i find the folowing lines:
***********************************************************************
Fatal NI connect error 6413, connecting to:
(DESCRIPTION=(ADDRESS=(PROTOCOL=TCP)(HOST=127.0.0.1)(PORT=1521))(CONNECT_DATA=(SID=XE)(CID=(PROGRAM=C:\Program Files (x86)\Quest Software\Toad for Oracle\toad.exe)(HOST=OCTOPUS)(USER=Joost))))
VERSION INFORMATION:
TNS for 32-bit Windows: Version 10.2.0.1.0 - Production
Time: 25-JUL-2007 09:07:35
Tracing not turned on.
Solution 2 worked fine for me.
I deinstalled Toad from the following location
C:\Program Files (x86)\Quest Software\Toad for Oracle\
and reinstalled it in the following location
C:\Oracle\Quest\Toad 9.1
This path doesn't contain any parenthesis so it doesn't cause the existing networking bug.
null
ref: link
อีกวิธี
Installation:
Windows 64-bit Operating System - Oracle Client Issue
The application supports a Windows 64-bit OS. However, changes will need to be made to the installation path during installation. The default install directory for 32-bit applications on a 64-bit OS includes parenthesis as shown in the following example:
C:\Program Files(x86)\Quest Software\
According to Oracle Metalink, Doc ID 334528, there is a network error that results causing any path with a parenthesis to have an issue. Toad will have to be installed into a different folder without the parenthesis as shown in the following example: C:\Quest Software\
Workaround:
RESOLUTION 1: Create a new folder that is not under the Program Files folder, such as C:\Quest Software\ and install Toad under this new folder. The installation program allows you to change the default installation path.
RESOLUTION 2: Upgrade to an Oracle Client 11g version. The following is an 11g Oracle Client download link that we recommend. Oracle Database 11g Release 1 Client (11.1.0.6.0) for Microsoft Windows win32_11gR1_client.zip (510,809,607 bytes)
http://www.oracle.com/technology/software/products/database/oracle11g/111060_win32soft.html
ref : link
คุณเคยออกกำลังสมองมั้ย?
อีกบทบาทหนึ่งของนักกิจกรรมบำบัดในการใช้กิจกรรมต่างๆ เพื่อกระตุ้นเซลล์สมองให้ออกกำลัง เพราะร่างกายต้องการการออกกำลังเพื่อให้ร่างกายแข็งแรงฉันใด เหตุใดสมองจึงไม่ต้องการการออกกำลังเพื่อป้องกันสมองฝ่อลีบเล่า
นักวิจัยพบว่าสมองส่วน Cerebral Cortex ของมนุษย์ สามารถสร้างเครือข่ายประสาท (Nerve Plexus) ซึ่ง เชื่อมต่อระหว่างเซลล์ประสาทแต่ละเซลล์ แม้ว่ามนุษย์ผู้นั้นจะมีอายุมากขึ้นแต่เครือข่ายเหล่านี้ก็ไม่หยุดเชื่อมต่อ ระหว่างกัน ซึ่งสรุปได้ว่าจำนวนเครือข่ายประสาทเหล่านี้เป็นตัวบ่งบอกว่าคนๆ นั้น จะมีอายุยืนยาวหรือไม่ ซึ่งโดยปกติเครือข่ายประสาทจะถูกสร้างเพิ่มขึ้นด้วยการออกกำลังสมอง
ปัจจุบัน พบว่าถึงแม้เซลล์สมองจะลดลงในผู้สูงอายุ แต่ถ้ามีการเชื่อมต่อระหว่างเซลล์มากขึ้น เซลล์เหล่านี้จะไปทดแทนและทำหน้าที่แทนเซลล์ที่ตายแล้ว ซึ่งทำให้สมองยังคงมีประสิทธิภาพทั้งๆ ที่อายุมากขึ้น จากงานวิจัยพบว่าคนทำงานที่ต้องใช้ความคิดสร้างสรรค์ หรือความจำ จะอายุยืนยาวกว่าคนที่ทำงานโดยไม่ต้องใช้สมอง เช่น งานซักรีดประจำวัน ซึ่งโดยมากใช้ความเคยชินในการทำงาน ดังนั้นเราไม่ควรปล่อยให้สมองอยู่เฉยๆ แต่ควรจะต้องใช้สมองทำงานซึ่งจะทำให้สมองทำงานอย่างมีประสิทธิภาพ นำไปสู่การมีอายุยืนยาวขึ้น หากเราละเลยไม่ใช้สมอง ก็จะทำให้สมองเสื่อมและเหี่ยวแฟบลงในที่สุด
ผู้ สูงอายุส่วนใหญ่จะไม่สามารถจำเหตุการณ์ซึ่งเพิ่งเกิดขึ้นได้ เพราะประสบการณ์ชีวิตของท่านเหล่านั้นสอนให้ท่านจำแต่เรื่องที่จำเป็น โดยสมองจะคัดเรื่องที่ไม่สำคัญทิ้งไปเพื่อให้สมองไม่ทำงานหนักเกินไป ดังนั้นถ้าเราต้องการป้องกันสมองถดถอย เราจะต้องใช้สมองทำงานหลายอย่าง เช่น ถ้าเราเก่งคำนวณ ซึ่งถือเป็นส่วนหนึ่งของสาขาวิทยาศาสตร์ เราควรจะรู้ด้านศิลปะด้วย โดยอาจจะฝึกเล่นดนตรีและวาดภาพ ขณะเดียวกันถ้าเราเป็นนักดนตรี เราควรเรียนรู้เกี่ยวกับเทคโนโลยีใหม่ๆ ในด้านวิทยาศาสตร์ การทำเช่นนี้จะช่วยกระตุ้นให้สมองอีกด้านหนึ่งทำงาน เป็นการป้องกันไม่ให้สมองทำงานหนักเกินไปเพียงด้านเดียว ดังนั้นเราควรสนใจหัดเล่นเกมส์คอมพิวเตอร์บ้างในบางครั้งบางคราว ซึ่งการทำสิ่งที่เราไม่เคยทำมาก่อนจะช่วยกระตุ้นเซลล์สมองให้สร้างเครือข่าย ประสาทเพื่อเชื่อมต่อกับเซลล์สมองอื่นๆ ในกระบวนการทำงานหรือการเรียน เป็นอีกกิจกรรมที่ช่วยกระตุ้นให้สมองสร้างเครือข่ายและเชื่อมกับระบบประสาท ซึ่งจะทำให้เราสามารถใช้สมองได้อย่างมีประสิทธิภาพ และลดอาการสมองถดถอยลง ทำให้อายุของเรายืนยาวขึ้นซึ่งช่วยให้เราสนุกกับการทำกิจกรรมในชีวิตต่อไป
เทคนิควิธีการง่ายๆ ที่จะช่วยออกกำลังสมอง มีดังนี้
1. พยายามเดินถอยหลังแทนการเดินไปข้างหน้าเพียงอย่างเดียว
2. พยายามนับเลขถอยหลัง เช่น 100, 99, 98 .... แทนการนับแบบปกติ 1, 2, 3 ....
3. ถ้าเคยชินกับการเขียนด้วยมือขวา ก็ลองใช้มือซ้ายหัดเขียน ในทำนองเดียวกันถ้าถนัดซ้าย ก็หัดเขียนมือขวา แล้วจะพบว่าในที่สุดเราสามารถใช้ทั้งมือขวาหรือมือซ้ายเขียนได้
4. ถ้าเป็นพนักงานบัญชีและทำงานกับตัวเลขทั้งวัน ลองพยายามหัดทำงานในเชิงศิลปะ เช่น ทำสร้อยข้อมือหรือสร้อยคอจากหินสีต่างๆ ทำงานเพ็นต์สีลายกระจกหรือขวด หรือหัดทำเค้กรูปแบบและลายต่างๆ
5. ถ้าทำงานสำนักงานและต้องทำงานกับคอมพิวเตอร์ในห้องเย็นๆ ทั้งวัน หลังเลิกงานควรหากิจกรรมที่จะกระตุ้นร่างกายให้เคลื่อนไหวทำ เช่น ลีลาศหรือเต้นรำในจังหวะต่างๆ ว่ายน้ำ ดำน้ำ หรือ โยคะ เป็นต้น
6. ถ้าทำงานด้านศิลปะอยู่แล้ว ให้หัดเล่นเกมส์คอมพิวเตอร์ เรียนการใช้ลูกคิดแบบญี่ปุ่น หรือ หัดขับรถโกคาร์ท (Go Kart) เป็นต้น
7. ถ้าเป็นนักกีฬาอาชีพ และใช้กำลังทางร่างกายอยู่เสมอ อาจจะต้องพยายามใช้สมองเพื่อการคิด เช่น เล่นเกมส์ปริศนาอักษรไขว้ (Crossword) หรือเรียนภาษาต่างประเทศเพิ่มเติม
นี่เป็นเพียงตัวอย่างเพื่อช่วยให้เกิดความคิดในการออกกำลังสมองทั้ง 2 ด้าน และทำให้มีการสร้างเครือข่ายประสาท (Nerve Plexus) เชื่อมโยงเป็นเครือข่ายมากขึ้น เท่านี้ก็สามารถป้องกันสมองฝ่อได้โดยไม่ต้องใช้ยา
ความ ลับคือ ถ้าเราทำงานอาชีพด้านใด ให้พยายามทำสิ่งตรงข้ามกับงานอาชีพที่ทำเป็นประจำ เพื่อให้สมองได้รับการกระตุ้นและเรียนรู้สิ่งใหม่ๆ ตลอดเวลา ในขณะเดียวกันก็ช่วยให้สมองไม่ทำงานด้านเดียวหนักเกินไป
“เริ่มเสียแต่วันนี้ อย่ารอจนคุณแก่เกินแก้ไข”
เทคนิคการอ่านอย่างรวดเร็วจะช่วยให้คุณไม่เครียดเกินไป และช่วยให้การทำงานมีประสิทธิภาพดียิ่งขึ้น
หากเป็นหนังสือโร มานซ์ คุณก็คงนั่งอ่านนอนอ่านอย่างเพลิดเพลิน และเผลอๆ อาจฝันว่าตัวเองเป็นนางเอกของเรื่องก็เป็นได้ แต่เมื่อเจอกองเอกสารพะเนินเทินทึกหรือหนังสือวิชาการต่างๆ ก็อาจทำให้คุณหัวหมุนได้ คุณจึงจำเป็นต้องเรียนรู้เทคนิค "Speed Reading" เพราะมันจะช่วยให้คุณประหยัดเวลาในการอ่านได้ถึงครึ่งหนึ่งโดยไม่ทำความเข้า ใจผิดพลาด มีเทคนิค 5 ข้อให้คุณฝึกเป็นนักอ่านสมองไว
1. วัดระดับความเร็วของตัวเอง คุณอ่านหนังสือได้เร็วมั้ย ลองทดสอบตัวเองดูสิคะ โดยการอ่านบทความหนึ่ง 1 นาทีโดยใช้ความเร็วธรรมดา แล้วนับคำที่คุณอ่านได้จำนวนคำที่คุณอ่าน บอกได้ถึงความเร็วในการอ่านของคุณ และเพื่อการทำความเข้าใจกับบทความ ก็ให้คุณเขียนสิ่งที่คุณเข้าใจในการอ่านออกมา ถ้าคุณเขียนได้มากขึ้นก็จะยิ่งดีขึ้นเรื่อยๆ ลองฝึกฝนบ่อยๆ แล้วคุณจะเห็นความเปลี่ยนแปลงที่ดีขึ้น
2. ผู้ช่วยตัวสำคัญ บางครั้งตาของคุณก็ไม่ได้จดจ่อกับตัวหนังสือใช่มั้ยจึงต้องอ่านไปมาหลายรอบ และเพื่อป้องกันอาการที่ว่านี้ก็ต้องมีผู้ช่วยตัวสำคัญ นั่นก็คือ การใช้ดินสอลากตัวหนังสือที่กำลังอ่านไปเรื่อยๆ ไล่ไปทีละคำด้วยความเร็วที่สม่ำเสมอจากซ้ายไปขวา และเมื่อจบบรรทัดก็ให้รีบเร่งบรรทัดใหม่ต่อไป
3. ฝึกความเร็วในการอ่าน หากฝึกอ่านหนังสือด้วยความเร็วสูงจะช่วยฝึกความสามารถในการอ่านได้ดี แม้ว่าจะเข้าใจเพียงเล็กน้อยก็ตาม เหตุที่เป็นเช่นนั้นก็เพราะว่าสมองจะชินกับความเร็วที่อ่าน ผลที่ได้ก็คือ การอ่านในระดับความเร็วธรรมดาที่อ่านแล้วจะทำให้เข้าใจเร็วขึ้น ให้คุณลองฝึกอ่านบทความภายในเวลา 3 นาที และต่อมาก็ใช้เวลาให้น้อยลงเป็น 2 นาที กับบทความเดิม และลดลงเหลือ 1 นาที และให้คุณฝึกบ่อยๆ จนกระทั่งคุณใช้เวลาสั้นๆ โดยไม่จำเป็นต้องเข้าใจบทความอย่างเพอร์เฟ็กต์
4. ฝึกอ่านทำความเข้าใจ การอ่านหนังสือเพื่อให้เข้าใจเนื้อเรื่องทั้งหมดเป็นเรื่องที่คุณจำเป็นต้อง ฝึกฝนด้วยการมองหนังสือปราดเดียวก็เข้าใจ ให้คุณอ่านบทความในหนังสือพิมพ์และปิดหนังสือหนึ่งบรรทัดแล้วเปิดมือขึ้น เพื่อมองปราดเดียวแล้วพยายามเขียนถึงสิ่งที่คุณอ่านออกมา ให้ฝึกจนกระทั่งสายตาของคุณเข้าใจกับข้อความนั้นๆจากนั้นก็เริ่มบรรทัดต่อไป
5. ทำความเข้าใจกับบทความด้วยการมองผ่าน คุณได้ฝึกการอ่านแบบมองปราดเดียวมาแล้ว ดังนั้น คุณก็พร้อมที่จะฝึกขั้นต่อไป ให้คุณอ่านบทความโดยไม่มีผู้ช่วยด้วยการมองอ่านปราดเดียว ในการฝึกก็ให้คุณใช้ดินสอสีขีดบรรทัดในแนวดิ่ง ให้อ่านทั้งกลุ่มคำโดยไม่ต้องอ่านคำต่อคำ ด้วยสายตา ที่ตวัดบรรทัดต่อบรรทัด และให้ฝึกต่อโดยไม่ต้องใช้ดินสอสีขีดเส้นบรรทัดที่อ่านอีก แต่ให้ใช้ความจำ
Tip อ่านหน้าจอคอมพิวเตอร์
การอ่านหนังสือ หน้าจอคอมพิวเตอร์มักทำให้สายตาเมื่อยล้า ดังนั้น หากเป็นบทความยาวๆก็ขยายตัวหนังสือให้ใหญ่ขึ้นและใช้เมาส์ช่วยในการอ่าน เปิดจออินเตอร์เน็ตให้แคบลงเพื่อเลี่ยงแสงกะพริบจากโฆษณา ปิดเพลงและนั่งตัวตรงอ่านทำความเข้าใจ
ref : link
หลังจาก วันอาทิตย์สุดท้าย ของเดือนตุลาคม
จะมีการเปลี่ยน เวลาฤดูร้อน เป็น เวลาฤดูหนาว
หรือ จาก เวลา Central European Summer Time (CEST) เป็นเวลา Central European Time (CET)
http://en.wikipedia....l_European_Time
อังกิด จาก UTC+1 เป็น UCT+0
เยอรมัน จาก UTC+2 เป็น UTC+1
(ประเทศไทย UTC+7)
http://th.wikipedia....%B8%B1%E0%B8%94
หมายความว่า
จากที่เวลาเคยห่างจาก อังกิด 6 ชั่วโมง จะเปลี่ยน เป็นห่าง 7 ชั่วโมง
จากที่เวลาเคยห่างจาก เยอรมัน 5 ชั่วโมง จะเปลี่ยน เป็นห่าง 6 ชั่วโมง
และเวลาจะสิ้นสุดใน วันอาทิตย์สุดท้ายของเดือนมีนาคม
certificate expired ซะงั้นดูจากปีพ.ศ.แล้ว (2497) น่าจะเกิดตอนลง SDK แล้วเครื่องเราตั้งระบบวันที่ของไทย เลยได้ certificate expired มาผิด
วิธีแก้ตามที่หลายเว็บแนะนำคือให้ไปลบไฟล์ “debug.keystore” ถ้าเป็น vista หรือ 7 อยู่ที่ C:\Users\ชื่อเครื่อง\.android ถ้า xp ก็อยู่ที่ C:\Documents and Settings\ชื่อเครื่อง\.android จากนั้นให้ไปเปลี่ยนภาษาใน control panel >> Regional and Language Options เป็น English(United States) แต่ลองแล้วก็ error เหมือนเดิม ไปเจออีกวิธีนึงได้ผลชะงักเลยตามด้านล่างครับ
เปิด command prompt แล้วพิมพ์
keytool -genkey -keypass android -keystore debug.keystore -alias androiddebugkey -storepass android -validity 10000 -dname "CN=Android Debug,O=Android,C=US"
ref : link1 , link2
If you install ubuntu as a guest on virtual box, you need to do a couple of things to install the virtualbox additions:
- Mount your ubuntu cd/iso from the virtualbox GUI.
- Install GNU Compiler and header files (use the command uname -r and substitute it with KERNELVERSION in the command below)
sudo apt-get install build-essential linux-headers-KERNELVERSION
- Now mount the VirtualBoxAdditions cd/iso from the virtualbox GUI.
- Run the VirtuaBox installer:
sudo sh /media/cdrom/VBoxLinuxAdditions.run all
- Restart the virtual machine and you are all done!
This may sound silly suggestion to even post on Windows Reference but will help avoid some annoyance with Windows Vista and Windows 7. The host file is the one where one enters hostname and IP Address pair manually as against being served by a Name server (ex: DNS). As always the “host” file is under C:\windows\system32\drivers\etc\ or %systemroot%\system32\drivers\etc\ and hence cannot be edited by normal users.
To edit the host file,
Click Start – search for “Notepad“, right-click and select “Run as Administrator“. This should launch notepad with elevated privileges. Now, open the host file from the File menu, edit and save.
Everytime I reinstall the Windows, all my PuTTY session records are gone. That would be a nightmare, if I have to add back my servers records one by one.
Open the registry:
Start Menu -> Run -> regedit
Go to "HKEY_CURRENT_USER\Software\SimonTatham"
Right-click SimonTatham and choose Export
Copy the file to a new machine and then right-click and "Merge"
Open the registry:
Start Menu -> Run -> regedit
Go to "HKEY_CURRENT_USER\Software\SimonTatham"
Right-click SimonTatham and choose Export
Copy the file to a new machine and then right-click and "Merge"
อ่านในกระทู้ ปัญหากับ method setAttribute(), non-serializable (Narisa.com) มีความรู้ดีๆหลายเรื่อง
1. คุณ Siros post:
เนื่อง จากว่า Servlet container อาจจะไม่ได้ handle object ใน session เป็น local object เสมอไป .. เป็นไปได้ว่า เรา deploy server เป็น cluster แล้วให้ server มันทำ session replication (จะได้ทำ fail-over ได้) ... ดังนั้น object จาก session ใน server หนึ่ง อาจจะต้องถูกส่งไป เพื่อ synchronize กับ session ใน server อื่นๆ ด้วย ... นี่เป็นเหตุผลว่าทำไม ถึงต้อง Serializable ครับ
2. คุณ nohc post:
สิ่งที่กำหนดว่า Object นั้นคือตัวเดียวกันในการ De/Serialize คือ attribute serialVersionUID ใน Class นั่นเองครับ ถ้าอย่างนั้น hashCode() กับ equals() ไว้ทำอะไร สองตัวนี้ใช้ในการเปรียบเทียบ Object กับการทำ hash code ครับ เช่น Object ที่ใส่ไว้ใน HashMap ควรจะต้อง implement สอง method นี้ ยังมีอีกตัวครับที่ออกจะคุ้นเคยกันอยู่คือ compareTo(), method นี้จะใช้ใน Comparator หรือการ Sorting เท่านั้นครับ
- serialVersionUID ใช้ใน Serializable
- hashCode(), equals() ใช้ใน Hash
- compareTo() ใช้ใน Comparator
เหตุผล ของการ Serializable ไม่ใช่แค่เรื่องของ Session Replication เท่านั้นน่ะครับ การแปลง Object จะรูปแบบหนึ่งไปยังอีกรูปแบบหนึ่ง หรือเมื่อไรก็ตามที่ JVM ทำการเรียก writeObject() และ readObject() ตัว Object นั้น ๆ ต้องทำการ Serializable เสมอ
เช่นการแปลง Object เป็น file, ส่งผ่าน Object ทาง Network, เก็บ Object ลง Session, เรียก Object ผ่าน RMI เป็นต้นครับ
- ทำไม่แทบไม่เห็นใครใส่ Attribute serialVersionUID ลงใน Class ของเขาเวลา implement Serialzable
เพราะ ว่ากระบวนการของ JVM เวลาเราทำการประกาศ Class โดยการ implement Serializable ตัว JVM เองจะทำการตรวจสอบดูก่อนว่าเรามีการประกาศ Attribute serialVersionUID หรือเปล่า ถ้าไม่มีการประกาศ JVM จะทำการ Generate serialVersionUID ให้เราเองครับ ดังนั้นจึงไม่จะเป็นที่ต้องใส่ serialVersionUID เองใน Class อย่างไรก็ดีทาง SUN ใน strongly recommended ให้ทำการ ใส่ serialVersionUID ลงใน Class ของเรา เนื่องจากว่าในโลกนี้ไม่ได้มีแค่ SUN JVM ไงครับ SUN JVM ทำการ generate serialVersionUID ให้แต่ BEA, IBM, GNU, Microsoft JVM อาจไม่ได้ทำให้เราก็ได้ไงครับ
- แล้ว hashCode() กับ equals() จำเป็นแค่ไหนในการ implement ตัว JVM เองสามารถ generate ให้เหมือน serialVersionUID หรือไม่
คำ ตอบคือจำเป็นครับ และตัว JVM ก็ generate ให้ด้วย ที่บอกว่าจำเป็นเพราะว่า default generator ของ JVM จะทำการ generate hash code โดยเอา memory address ของ Object นั้นมาทำการ generate และ method equals() จะทำการเปรียบเทียบ โดยใช้ address เป็นตัวเปรียบเทียบครับ หมายความว่าทุกครั้งที่เราทำการ allocate memory ให้ Object ตัวใหม่ ก็จะ้ได้ hashCode() คนละตัวกันถึงแม้ว่า Object ของเรานั้นจะมีค่าเดียวกันก็ตาม เพราะฉะนั้นเมื่อไรก็ตามที่เราต้องการ identify Object ของเราโดย value ไม่ใช่ address เราก็ตัอง implement hashCode() กับ equals() เสมอครับ
Navigate with XPath
Finding Elements by Content in a DOM Document Using XPath
http://dom4j.sourceforge.net/dom4j-1.6.1/guide.html
Ref : link1
XPath หมายถึงภาษานึงที่ใช้งานร่วมกับ XML เพื่อใช้ในการดึงข้อมูลออกจากเอกสาร XML เป็นภาษาง่าย ๆ ในการใช้งาน สมมติเรามีข้อมูล XML ดังนี้ (ไฟล์ Berryz_Kobo.xml ในตัวอย่าง)
ปล , สามารถโหลด Code ตัวอย่าง ไฟล์ข้อมูลทั้งหมดได้ที่นี่ -> Example - XPath with Java.rar
--------------------------------------------------------------------------------------
--------------------------------------------------------------------------------------
จากข้อมูล XML ที่ให้มา สมมติว่าต้องการจะอ่านข้อมูลชื่อ Single ทั้ง 15 ออกมา หากใช้ Java ปกติอ่านเข้ามา จะใช้ DOM (Document Object Model) อ่านเข้ามา ดัง Code ข้างล่าง (สร้างไฟล์อ่าน XML ชื่อ XMLRead.java)
--------------------------------------------------------------------------------------
import java.io.File;
import javax.xml.parsers.DocumentBuilder;
import javax.xml.parsers.DocumentBuilderFactory;
import org.w3c.dom.Document;
import org.w3c.dom.NodeList;
import org.w3c.dom.Node;
public class XMLRead {
public static void main(String[] args) throws Exception {
DocumentBuilderFactory domFactory = DocumentBuilderFactory.newInstance();
domFactory.setNamespaceAware(true);
DocumentBuilder builder = domFactory.newDocumentBuilder();
Document doc = builder.parse(new File("Berryz_Kobo.xml"));
Node berryzNode = doc.getFirstChild();
System.out.println("ROOT NODE NAME = "+berryzNode.getNodeName());
NodeList childNodes = berryzNode.getChildNodes();
for(int i=0; i < childNodes.getLength() ; i++){
Node dataNode = childNodes.item(i);
if( "singles".equalsIgnoreCase(dataNode.getNodeName())){
NodeList singleNodes = dataNode.getChildNodes();
for(int j=0; j < singleNodes.getLength() ; j++){
Node singleNode = singleNodes.item(j);
if( "single".equalsIgnoreCase( singleNode.getNodeName()) ){
NodeList nameNodes = singleNode.getChildNodes();
for(int k=0; k < nameNodes.getLength() ; k++){
Node nameNode = nameNodes.item(k);
if( "name".equalsIgnoreCase( nameNode.getNodeName())){
NodeList textNodes = nameNode.getChildNodes();
for(int l=0; l < textNodes.getLength() ; l++){
Node textNode = textNodes.item(l);
if( textNode.TEXT_NODE == textNode.getNodeType() ){
System.out.println("SINGLE = "+textNode.getNodeValue());
}
}
}
}
}
}
}
}
}
}
--------------------------------------------------------------------------------------
เมื่อสั่งรันดูจะได้ผลดังนี้ (ต้องมีไฟล์ Berryz_Kobo.xml อยู่ในโฟลเดอร์เดียวกับไฟล์ XMLRead.java ด้วย)

รูปแบบการอ่านของ DOM จะเป็นแบบ Tree ที่เริ่มจาก Root Node เสมอ ดังนั้นเมื่อสั่ง doc.getFirstChild() จะได้ berryzNode มา และจาก Root Node เราสามารถเข้าถึง Node ย่อย ๆ ได้ โดยเรียก getChildNodes() method ซึ่งการที่เราจะเอาชื่อ Single ออกมา ก็ต้องเข้าไปถึง “name” node ที่อยู่ภายใต้ “single” node (แต่ละ tag ก็คือ node ย่อยนั่นเอง) มีข้อสังเกตนิดนึงว่าข้อความ Text ใน Node นั้น จะถูกถือเป็น childNode ของ node นั้น ๆ โดยมี Type เป็น TEXT_NODE (จะเห็นว่าไม่ใช่ getNodeValue() ของ Node “name” แต่เป็น getNodeValue() ของ childNode ของ “name” Node ที่มี Type เป็น TEXT_NODE แทน)
จะเห็นว่ากว่าจะได้ข้อความมาแต่ละอันนั้นช่างลำบากยากเย็นเสียเหลือเกิน วนลูปกันจนเหนื่อย XPath สามารถช่วยลดเวลาเราได้ ดังนี้
สร้างไฟล์ XpathRead.java ขึ้นมา มี Code ดังข้างล่าง (ไว้ที่เดียวกับ XMLRead.java และ Berryz_Kobo.xml)
--------------------------------------------------------------------------------------
import java.io.File;
import javax.xml.parsers.DocumentBuilder;
import javax.xml.parsers.DocumentBuilderFactory;
import javax.xml.XMLConstants;
import javax.xml.namespace.NamespaceContext;
import javax.xml.xpath.XPath;
import javax.xml.xpath.XPathConstants;
import javax.xml.xpath.XPathExpression;
import javax.xml.xpath.XPathFactory;
import org.w3c.dom.Document;
import org.w3c.dom.NodeList;
import org.w3c.dom.Node;
public class XPathRead {
public static void main(String[] args) throws Exception {
DocumentBuilderFactory domFactory = DocumentBuilderFactory.newInstance();
domFactory.setNamespaceAware(true);
DocumentBuilder builder = domFactory.newDocumentBuilder();
Document doc = builder.parse(new File("Berryz_Kobo.xml"));
XPathFactory factory = XPathFactory.newInstance();
XPath xpath = factory.newXPath();
XPathExpression expr = xpath.compile("//name/text()");
Object result = expr.evaluate(doc, XPathConstants.NODESET);
NodeList textNameNodes = (NodeList) result;
for (int i = 0; i < textNameNodes.getLength(); i++) {
Node textNode = textNameNodes.item(i);
System.out.println("Single = "+textNode.getNodeValue());
}
}
}
--------------------------------------------------------------------------------------
เมื่อสั่งรันโปรแกรม ได้ผลดังนี้

สังเกตว่าใช้ XPath Query เป็น “//name/text()” ในการดึง text node ออกมาจาก node “name” โดย // หมายถึงให้วิ่งหา node ทุกตัวภายใต้ XML ปัจจุบัน (เมื่อใส่ //name จึงหมายถึงหา Node ที่มีชื่อว่า “name” ออกมาจาก XML ) /text() คือให้เอา text node ภายใต้ node ก่อนหน้าออกมา
ในความจริงการใช้ // ค่อนข้างจะเปลือง Performance ของโปรแกรมพอสมควร (เพราะวิ่งหาทั้ง XML เลย) เราสามารถเขียนให้ยาวขึ้นหน่อยนึง แต่มีประสิทธิภาพดีขึ้น โดยใช้ XPath Query เป็น “/berryz/singles/single/name/text()” (ทดลองเปลี่ยนดูได้ จะพบว่าให้ผลเหมือนเดิมเป๊ะ)
อันนี้เป็นเรื่องปกติของ XML คนที่ศึกษาอาจจะรู้อยู่แล้ว ทีนี้มาถึงเรื่องหลักที่อยากเขียนจริง ๆ เกี่ยวกับการใช้ XPath กับ Java ก็คือ เมื่อคุณไปเจอ XML ที่มีการระบุ Namespace คุณจะพบว่าการอ้างชื่อของ XML นั้นด้วย XPath จะไม่สามารถทำได้ ดังนี้
1. สร้างไฟล์ XML ที่มีการระบุ Namespace ชื่อ Berryz_Kobo_NS.xml ข้างในมีเนื้อหาดังนี้
--------------------------------------------------------------------------------------
--------------------------------------------------------------------------------------
สังเกตว่ามีการใส่ xmlns=http://boris-chung.live.space.com เพิ่มเติมเข้าไปใน root node แบบนี้คือการเพิ่ม Namespace เข้าไป การเพิ่มเข้าไปแบบนี้จะทำให้ childNode ของ node ที่เพิ่ม มีผลอยู่ใน Namespace ที่กำหนดด้วย
2. ลองสร้างไฟล์ XPathReadNS.java ขึ้นมา ข้างในมีเนื้อหาเหมือนไฟล์ XPathRead.java เพียงแต่เปลี่ยนไปอ่านไฟล์ Berryz_Kobo_NS.xml แทน ดังนี้
--------------------------------------------------------------------------------------
import java.io.File;
import javax.xml.parsers.DocumentBuilder;
import javax.xml.parsers.DocumentBuilderFactory;
import javax.xml.XMLConstants;
import javax.xml.namespace.NamespaceContext;
import javax.xml.xpath.XPath;
import javax.xml.xpath.XPathConstants;
import javax.xml.xpath.XPathExpression;
import javax.xml.xpath.XPathFactory;
import org.w3c.dom.Document;
import org.w3c.dom.NodeList;
import org.w3c.dom.Node;
public class XPathReadNS {
public static void main(String[] args) throws Exception {
DocumentBuilderFactory domFactory = DocumentBuilderFactory.newInstance();
domFactory.setNamespaceAware(true);
DocumentBuilder builder = domFactory.newDocumentBuilder();
Document doc = builder.parse(new File("Berryz_Kobo_NS.xml"));
XPathFactory factory = XPathFactory.newInstance();
XPath xpath = factory.newXPath();
XPathExpression expr = xpath.compile("/berryz/singles/single/name/text()");
Object result = expr.evaluate(doc, XPathConstants.NODESET);
NodeList textNameNodes = (NodeList) result;
for (int i = 0; i < textNameNodes.getLength(); i++) {
Node textNode = textNameNodes.item(i);
System.out.println("Single = "+textNode.getNodeValue());
}
}
}
--------------------------------------------------------------------------------------
เมื่อสั่งรันโปรแกรมดู จะได้ผลดังนี้

ไม่ปรากฏอะไรขึ้นมาเลย (อันนี้รันบน Editplus พอรันเสร็จมันจะหยุดให้กดคีย์ใด ๆ ให้อัตโนมัติ แต่ถ้ารันบน Command-Prompt จะผ่านไปเลย) ทั้งนี้เพราะ XPath ไม่สามารถเข้าถึง Node ใด ๆ ที่มีการกำหนด Namespace เอาไว้ได้ หากไม่กำหนด Namespace ให้กับ XPath ก่อน ซึ่งขั้นตอนในการที่จะทำให้ XPath สามารถใช้งานกับ Node ที่มีการกำหนด Namespace เอาไว้นั้น ทำได้ดังนี้
1) สร้าง Class ที่ implement class “NamespaceContext” ดังนี้ (ในที่นี้ใช้ชื่อไฟล์ NamespaceContextProvider.java)
--------------------------------------------------------------------------------------
import java.util.Iterator;
import javax.xml.XMLConstants;
import javax.xml.namespace.NamespaceContext;
public class NamespaceContextProvider implements NamespaceContext {
String boundPrefix, boundURI;
NamespaceContextProvider (String prefix, String URI) {
boundPrefix = prefix;
boundURI = URI;
}
public String getNamespaceURI (String prefix) {
if (prefix.equals(boundPrefix)) {
return boundURI;
}
else if (prefix.equals(XMLConstants.XML_NS_PREFIX)) {
return XMLConstants.XML_NS_URI;
}
else if (prefix.equals(XMLConstants.XMLNS_ATTRIBUTE)) {
return XMLConstants.XMLNS_ATTRIBUTE_NS_URI;
}
else {
return XMLConstants.NULL_NS_URI;
}
}
public String getPrefix (String namespaceURI) {
if (namespaceURI.equals(boundURI)) {
return boundPrefix;
}
else if (namespaceURI.equals(XMLConstants.XML_NS_URI)) {
return XMLConstants.XML_NS_PREFIX;
}
else if (namespaceURI.equals(XMLConstants.XMLNS_ATTRIBUTE_NS_URI)) {
return XMLConstants.XMLNS_ATTRIBUTE;
}
else {
return null;
}
}
public Iterator getPrefixes (String namespaceURI) {
return null;
}
}
--------------------------------------------------------------------------------------
ในการ implement class นี้ต้อง implement 3 method โดยเราจะกำหนด prefix ที่ต้องการใช้จับคู่กับ Namespace และค่า uri ของ Namespace ของ tag นั้น ๆ ตอนนี้ดู ๆ ไปอาจจะยังไม่เข้าใจ ให้เข้าใจง่าย ๆ ว่า Copy ไปเลยก็แล้วกัน ง่ายดี
2) ใน Code ที่จะเรียกใช้งาน XPath นั้น เพิ่มการกำหนด Namespace เข้าไปดังนี้
--------------------------------------------------------------------------------------
import java.io.File;
import javax.xml.parsers.DocumentBuilder;
import javax.xml.parsers.DocumentBuilderFactory;
import javax.xml.XMLConstants;
import javax.xml.namespace.NamespaceContext;
import javax.xml.xpath.XPath;
import javax.xml.xpath.XPathConstants;
import javax.xml.xpath.XPathExpression;
import javax.xml.xpath.XPathFactory;
import org.w3c.dom.Document;
import org.w3c.dom.NodeList;
import org.w3c.dom.Node;
public class XPathReadNS {
public static void main(String[] args) throws Exception {
DocumentBuilderFactory domFactory = DocumentBuilderFactory.newInstance();
domFactory.setNamespaceAware(true);
DocumentBuilder builder = domFactory.newDocumentBuilder();
Document doc = builder.parse(new File("Berryz_Kobo_NS.xml"));
XPathFactory factory = XPathFactory.newInstance();
XPath xpath = factory.newXPath();
//Namespace Specify
NamespaceContext nsContext = new NamespaceContextProvider("sinName" , "http://boris-chung.live.space.com");
xpath.setNamespaceContext(nsContext);
XPathExpression expr = xpath.compile("/sinName:berryz/sinName:singles/sinName:single/sinName:name/text()");
Object result = expr.evaluate(doc, XPathConstants.NODESET);
NodeList textNameNodes = (NodeList) result;
for (int i = 0; i < textNameNodes.getLength(); i++) {
Node textNode = textNameNodes.item(i);
System.out.println("Single = "+textNode.getNodeValue());
}
}
}
--------------------------------------------------------------------------------------
ชื่อ prefix นั้นเราจะกำหนดเป็นอะไรก็ได้ (ตามใจเรา) แต่จะต้องใช้ให้ตรงกันกับใน XPath Query ด้วย จากตัวอย่างคือ sinName โดยใช้กับ Namespace “http://boris-chung.live.space.com” และสังเกตว่าใน XPath Query นั้นตอนที่ระบุชื่อ tag จะต้องใส่ prefix นำหน้าทุกตัว (อย่าลืมว่า childNode ของ Node ที่กำหนด Namespace นั้น ก็จะถือว่ามี Namespace นั้นไปด้วย)
เมื่อรันไฟล์ออกมาได้ผลลัพธ์เหมือนเดิมดังนี้

สุดท้ายจะแถมเกี่ยวกับการใช้ XPath Query แบบที่กำหนดเงื่อนไขของ Attribute ให้ดูเป็นตัวอย่างเผื่อจะเอาไปใช้กัน สมมติว่าจะ Query สมาชิกที่ graduated ไปแล้ว (จากข้อมูล XML คือ “Ishimura Maiha”) ออกมา จะใช้ XPath Query ดังนี้
“/berryz/member[@graduated=’true’]/text()”
ให้ลองเอา XPath Query นี้ไปแทนในไฟล์ XPathRead.java ดู จะได้ผลลัพธ์ดังนี้

การใช้ @ เป็นการอ้างอิงถึง Attribute ของตัว Node ซึ่งในที่นี้เราอ้างถึงเฉพาะ member ที่มีค่า graduated เป็น “true” เท่านั้น จึงได้ Ishimura Maiha ออกมา
ก็เอามาฝากครับสำหรับท่านทียังไม่ทราบ ส่วนท่านใดที่ทราบแล้วขาดตกบกพร่องอย่างไรเพิ่มเติมได้เลยนะครับ
วิธีการทำ URL ภาษาไทยตอนสมัคร Blogger นะครับ
ก่อนอื่นเลยหา คำที่เราต้องการจะใช้ เช่น ในที่นี้ผมใช้ "โลกร้อน" นะครับ
หลังจากได้คำเสร็จแล้วก็เข้าไปสู่ หมาไฟ(FireFox) และพิมพ์ลงไปในช่อง URL เลยครับว่า
http://โลกร้อน.blogspot.com
หลังจากกด Enter URL ของเราจะถูกแปลงเป็นภาษาต่างด๊าว เอ้ย ภาษา English จะเป็นดังนี้ครับ
http://xn--12c2c3ag6byh3b.blogspot.com/
ให้เรา Copy "xn--12c2c3ag6byh3b" มาครับ
เข้าไปที่หน้าสร้าง Blog ใหม่ตรงช่องที่ให้ใส่ URL.blogspot.com
ก็ใส่ xn--12c2c3ag6byh3b เลยครับแล้วกด Check Available
เท่านี้ก็เป็นอ้นเสร็จเรียบร้อยครับผม
Ref : link1
When we implemented transactions using autowiring and TxManager in the spring config xml file, we ended up in having the well known org.hibernate.HibernateException: No Hibernate Session bound to thread, and configuration does not allow creation of non-transactional one here.
I was googling a bit on "No Hibernate Session bound to thread". Emphatically, I ended up with innumerous answers in several sites on the Internet. Springsource forum is not exception to this! Abundant conversations have been happening on this topic all around!!!
But there were a few best practices that I was able to compile from the chit-chats happening across the Internet. I thought of sharing the same here so that it would help some one some day in the near future!
PArticularly, if you are going to have the applicationContext.xml with the TxManager and the servletname-servlet.xml with the component scan annotations, then you are more likely to get this "No Hibernate Session bound to thread, and configuration does not allow creation of non-transactional one here" exception since the TxManager's transaction holds good for the current application context only (which in this case does not have the bean definitions for the service or the daos where you have the @ Trasactional annotations)
If you find the information pretty helpful, I would really be happy if you would keep me posted via the comments form displayed under this article! If you had wanted some other information related to the same topic, I would suggest you to drop a note to me using the comments form for that would help me in getting back to you with the details you are in need of!
Ref : link
I was googling a bit on "No Hibernate Session bound to thread". Emphatically, I ended up with innumerous answers in several sites on the Internet. Springsource forum is not exception to this! Abundant conversations have been happening on this topic all around!!!
But there were a few best practices that I was able to compile from the chit-chats happening across the Internet. I thought of sharing the same here so that it would help some one some day in the near future!
- First and foremost, configure the transaction manager properly : Use @Transaction annotation near your code and have a transactionManager bean in your spring config file.
- when integration a transaction manager, do not use hibernate.current_session_context_class and hibernate.transaction_factory_class in the hibernate properties unless you have proper reasons to
- Never call sessionFactory.openSession()
- Use ApplicationContext rather than using BeanFactory
- Have single dao instances running across the Application
- Above all, most importantly, ensure that the current application context has the component scan for the beans where you have added the @transactional annotations. as per spring documentation's @ Trasactional usage guidelines,
Point # 6 was the culprit in our case and that was then resolved! So the lessson was You are likely to get "No Hibernate Session bound to thread, and configuration does not allow creation of non-transactional one here" if you do not adhere to any of the above pointers.
only looks for@Transactionalon beans in the same application context it is defined in. This means that, if you putin aWebApplicationContextfor aDispatcherServlet, it only checks for@Transactionalbeans in your controllers, and not your services. See Section 15.2, “The DispatcherServlet” for more information.
PArticularly, if you are going to have the applicationContext.xml with the TxManager and the servletname-servlet.xml with the component scan annotations, then you are more likely to get this "No Hibernate Session bound to thread, and configuration does not allow creation of non-transactional one here" exception since the TxManager's transaction holds good for the current application context only (which in this case does not have the bean definitions for the service or the daos where you have the @ Trasactional annotations)
If you find the information pretty helpful, I would really be happy if you would keep me posted via the comments form displayed under this article! If you had wanted some other information related to the same topic, I would suggest you to drop a note to me using the comments form for that would help me in getting back to you with the details you are in need of!
Ref : link
If you are using Spring to wrap a Hibernate SessionFactory and you are not using Spring-managed transactions, you may run into an issue. The reason is that Spring by default will wrap Hibernate’s SessionFactory implementation and delegate to its own transactional version. If you are just using the simple ThreadLocal-based session-per-request functionality, then when you attempt to open the Session, you will get an IllegalStateException thrown, with the error message "No Hibernate Session bound to thread, and configuration does not allow creation of non-transactional one here". This happens because Spring’s SessionFactoryUtils checks if the Session is bound to Spring’s transactional support, and by default throws an error if it is not.
The solution to this is to set the property
<property name="exposeTransactionAwareSessionFactory"><value>false</value></property>
in the Spring config. This will return the “raw”
SessionFactory instead of the proxied one. A snippet of code from AbstractSessionFactoryBean shows where the check is done:
/**
* Wrap the given SessionFactory with a transaction-aware proxy, if demanded.
* @param rawSf the raw SessionFactory as built bybuildSessionFactory()
* @return the SessionFactory reference to expose
* @see #buildSessionFactory()
* @see #getTransactionAwareSessionFactoryProxy
*/
protected SessionFactory wrapSessionFactoryIfNecessary(SessionFactory rawSf) {
if (isExposeTransactionAwareSessionFactory()) {
return getTransactionAwareSessionFactoryProxy(rawSf);
}
else {
return rawSf;
}
}
A sample Spring config is shown below.
<beans xmlns="http://www.springframework.org/schema/beans"
       xmlns:xsi="http://www.w3.org/2001/XMLSchema-instance"
       xmlns:aop="http://www.springframework.org/schema/aop"
       xmlns:tx="http://www.springframework.org/schema/tx"
       xsi:schemaLocation="
       http://www.springframework.org/schema/beans http://www.springframework.org/schema/beans/spring-beans-2.0.xsd
       http://www.springframework.org/schema/tx http://www.springframework.org/schema/tx/spring-tx-2.0.xsd
       http://www.springframework.org/schema/aop http://www.springframework.org/schema/aop/spring-aop-2.0.xsd">

  <bean id="dataSource" class="org.apache.commons.dbcp.BasicDataSource" destroy-method="close">
    <property name="driverClassName" value="org.hsqldb.jdbcDriver"/>
    <property name="url" value="jdbc:hsqldb:hsql://localhost:9001"/>
    <property name="username" value="sa"/>
    <property name="password" value=""/>
  </bean>

  <bean id="sessionFactory" class="org.springframework.orm.hibernate3.annotation.AnnotationSessionFactoryBean">
    <property name="dataSource" ref="dataSource"/>
     <property name="exposeTransactionAwareSessionFactory"><value>false</value></property>
    <property name="annotatedPackages">
      <list>
        <value>uk.co.researchkitchen.hibernate</value>
      </list>
    </property>
    <property name="annotatedClasses">
        <list>
                <value>uk.co.researchkitchen.hibernate.Product</value>
                <value>uk.co.researchkitchen.hibernate.ProductDescription</value>
        </list>
    </property>
    <property name="hibernateProperties">
      <value>
        hibernate.dialect=org.hibernate.dialect.HSQLDialect
        hibernate.show_sql=true
            hibernate.hbm2ddl.auto=create
            hibernate.current_session_context_class=thread
      </value>
    </property>
  </bean>

</beans>
reference : link
Suppress all empty lines
Find: "^\n" (without quotes)
Replace: "" (without quotes)
RegExp
Note: You may have to repeat it several times to remove all empty lines (until the editor can't find the string to replace), because only the first one of a series of consecutive empty lines will be edited.
Suppress all non-empty lines
Find: "^.+$" (without quotes)
Replace: "" (without quotes)
RegExp
Comment out lines
Find: "^" (without quotes)
Replace: "// " (without quotes)
RegExp
Note: Empty lines will not be affected. This example actually adds a text at the beginning of every non empty line, the comment symbol used ("//") is the one of PHP.
Comment lines
Find: "$" (without quotes)
Replace: " // Comment here" (without quotes)
RegExp
Note: Empty lines will not be affected. This example actually adds a text at the end of every non empty line, the comment symbol used ("//") is the one of PHP.
Join lines
Find: "\n" (without quotes)
Replace: "," (without quotes)
RegExp
Note: Turn separated lines into comma separated values. Empty lines will be affected as well.
Split lines
Find: "," (without quotes)
Replace: "\n" (without quotes)
RegExp
Note: Turn comma separated values into separated lines. Consecutive commas will generate empty lines.
Remove all leading spaces and tabs from every line
Find: "^[ \t]+" (without quotes)
Replace: "" (without quotes)
RegExp
Note: this will obviously remove any indentation
Remove all trailing spaces and tabs from every line
Find: "[ \t]+$" (without quotes)
Replace: "" (without quotes)
RegExp
Remove consecutive spaces
Find: " +" (without quotes)
Replace: " " (without quotes)
RegExp
Example: before: "this is an example", after: "this is an example"
Fix punctuation
Find: "([\.\,\;\:\?\!])([a-zA-Z])" (without quotes)
Replace: "\1 \2" (without quotes)
RegExp
Example: before: "How are you?I'm fine,thanks.", after: "How are you? I'm fine, thanks."
Note: If you want to use this statement in a Wiki context, remove "\:" from the search string, otherwise you may break Wiki metatags, for example [[Category:Example]] will be replaced by [[Category: Example]]
Wrap a tag pair around a text
Find: "(bold)" (without quotes)
Replace: "\1" (without quotes)
RegExp
Example: before: "bold", after: "bold"
Wrap a tag pair around every line
Find: "^(.+)$" (without quotes)
Replace: "
RegExp
Note: this example wraps the tag pair every line to create a list of items; you'd probably want to apply changes only to a selected text.
Delete everything inside a tag pair (keeping tags)
Find: "(
Replace: "\1\2" (without quotes)
RegExp
Note: Tags must be on the same line.
Example: before: "this
Delete everything inside a tag pair (removing tags too)
Find: "
Replace: "" (without quotes)
RegExp
Note: Tags must be on the same line.
Example: before: "this
Delete all lines containing a given string
Find: "^.*STRING.*$" (without quotes)
Replace: "" (without quotes)
RegExp
Note: Lines will be emptied but not suppressed. See #Suppress all empty lines to suppress empty lines.
Replace only the first occurrence of a character
Find: ";(.*)" (without quotes)
Replace: "|\1" (without quotes)
RegExp
Note: In this example, only the first occurrence of ";" for each line will be replaced with "|".
Example: before: "this;is;an;example", after: "this|is;an;example"
Replace only the last occurrence of a character
Find: "(.*);" (without quotes)
Replace: "\1|" (without quotes)
RegExp
Note: In this example, only the last occurrence of ";" for each line will be replaced with "|".
Example: before: "this;is;an;example", after: "this;is;an|example"
Truncate a string after the first occurrence of a marker (keeping the marker)
Find: "^([^;]*;).*$" (without quotes)
Replace: "\1" (without quotes)
RegExp
Note: In this example, the marker is ";".
Example: before: "this;is;an;example", after: "this;"
Truncate a string at the first occurrence of a marker (removing the marker too)
Find: "^([^;]*);+.*$" (without quotes)
Replace: "\1" (without quotes)
RegExp
Note: In this example, the marker is ";".
Example: before: "this;is;an;example", after: "this"
Truncate a string after the last occurrence of a marker (keeping the marker)
Find: "^(.*;).*$" (without quotes)
Replace: "\1" (without quotes)
RegExp
Note: In this example, the marker is ";".
Example: before: "this;is;an;example", after: "this;is;an;"
Truncate a string at the last occurrence of a marker (removing the marker too)
Find: "^(.*);.*$" (without quotes)
Replace: "\1" (without quotes)
RegExp
Note: In this example, the marker is ";".
Example: before: "this;is;an;example", after: "this;is;an"
Truncate a string before than the first occurrence of a marker (keeping the marker)
Find: "^[^;]*(;.*)$" (without quotes)
Replace: "\1" (without quotes)
RegExp
Note: In this example, the marker is ";".
Example: before: "this;is;an;example", after: ";is;an;example"
Truncate a string up to the first occurrence of a marker (removing the marker too)
Find: "^[^;]*;(.*)$" (without quotes)
Replace: "\1" (without quotes)
RegExp
Note: In this example, the marker is ";".
Example: before: "this;is;an;example", after: "is;an;example"
Truncate a string before than the last occurrence of a marker (keeping the marker)
Find: "^.*(;.*)$" (without quotes)
Replace: "\1" (without quotes)
RegExp
Note: In this example, the marker is ";".
Example: before: "this;is;an;example", after: ";example"
Truncate a string up to the last occurrence of a marker (removing the marker too)
Find: "^.*;(.*)$" (without quotes)
Replace: "\1" (without quotes)
RegExp
Note: In this example, the marker is ";".
Example: before: "this;is;an;example", after: "example"
Turn a CSV table into a list of PHP if conditions
"^([^\,]+)\,([^\,]+)\,([^\,]+)$" (without quotes)
"elseif (vcmp$=="\1") {$v2="\2"; $v3="\3";}" (without quotes)
RegExp
Example: before: "Italy,Rome,Euro", after: elseif (vcmp$=="Italy") {$v2="Rome"; $v3="Euro";}
Note: In this example, there are three values per record, and the CSV separator is a comma (,), you may need to replace it with another character like \t for tab. Remember to change the first "elseif" to "if".
Truncate last value from a MySQL INSERT query
Find: "(VALUES \(.+), *.+\);" (without quotes)
Replace: "\1);" (without quotes)
RegExp
Example: before: "INSERT INTO table VALUES ('value1','value2','value3');", after: "INSERT INTO table VALUES ('value1','value2');"
Keep only last value in a MySQL INSERT query
Find: "(VALUES \(.+,)(.+\);)" (without quotes)
Replace: "VALUES (\2" (without quotes)
RegExp
Example: before: "INSERT INTO table VALUES ('value1','value2','value3');", after: "INSERT INTO table VALUES ('value3');"
Turn MySQL fields into empty values
Find: "`[^`]*`([\,\)\'\"])" (without quotes)
Replace: "''\1" (without quotes)
RegExp
Example: before: "INSERT INTO table (`phone`,`phonecell`,`fax`) VALUES (`phone`,`phonecell`,`fax`);", after: "INSERT INTO table (`phone`,`phonecell`,`fax`) VALUES ('','','');". (Only the second instance of "(`phone`,`phonecell`,`fax`)" must be selected and search and replace must be applied to such selection).
Note: this is meant to replicate the values in a INSERT query according to the specified fields (and use the empty values as a placeholder): you simply need to copy the fields and past them after VALUES, and then replace them this way.
Wikification: Link all elements of a list
Find: "(\*)(.*)$" (without quotes)
Replace: "\1[[\2]]" (without quotes)
RegExp
Example: before: "*Example", after: "*[[Example]]"
Wikification: Link all elements of a list, changing the linked text
Find: "(\*)(.*)$" (without quotes)
Replace: "\1[[\2_(category)|\2]]" (without quotes)
RegExp
Example: before: "*Example", after: "*[[Example_(category)|Example]]"
ลองไปเล่นดู เห็นว่าใช้ html5 http://benfirshman.com/projects/jsnes/
ควบคุมเครื่องระยะไกลด้วยรีโมทประสิทธิภาพ LOGMEIN
ขอบคุณ บทความจาก http://notebookspec.com
สวัสดีครับ วันนี้นำ Tip ดีๆมาฝากกันอีกครั้งกับโปรแกรมเรียกได้ว่าจำเป็นมากสำหรับทั้ง User ทั่วไป ช่างคอมพิวเตอร์หรือแม้กระทั่งสามารถประยุกต์ใช้ในการเรียนการสอนสมัยใหม่ ได้เช่นกัน ซึ่งโปรแกรมเด็ดวันนี้ก็คงจะเป็นใครไปไม่ได้นอกจาก โปรแกรม Logmein
ขอบคุณ บทความจาก http://notebookspec.com
สวัสดีครับ วันนี้นำ Tip ดีๆมาฝากกันอีกครั้งกับโปรแกรมเรียกได้ว่าจำเป็นมากสำหรับทั้ง User ทั่วไป ช่างคอมพิวเตอร์หรือแม้กระทั่งสามารถประยุกต์ใช้ในการเรียนการสอนสมัยใหม่ ได้เช่นกัน ซึ่งโปรแกรมเด็ดวันนี้ก็คงจะเป็นใครไปไม่ได้นอกจาก โปรแกรม Logmein
โปรแกรม Logmein โปรแกรมรีโมทควบคุมคอมพิวเตอร์ผ่านทาง Internet ซึ่งสามารถควบคุมได้ทุกอย่างเปรียบเสมือนดังเล่นอยู่หน้าคอมพิวเตอร์นั้นๆ ทำให้เราสามารถช่วยเหลือในการติดตั้งโปรแกรม แก้ไข จัดการคอมพิวเตอร์ให้กับเพื่อนหรือคนในครอบครัวได้ เพียงแค่เราติดตั้งโปรแกรมนี้ไว้ ไม่ว่าจะอยู่ที่ไหนก็จัดการได้โดยง่ายเลยทีเดียวครับ

โปรแกรม LogMeIn เป็นผลงานของบริษัทที่มีชื่อเดียวกันว่า LogMeIn โดยมุ่งเน้นประสิทธิภาพในเรื่องของความปลอดภัยและสะดวกต่อการใช้งานเป็นหลัก โดยองค์กรนี้ได้จัดการเกี่ยวกับระบบ Network มานานพอสมควร และมีเอกลักษณ์ในเรื่องเกี่ยวกับระบบ Remote Control เพื่อควบคุมเครื่องปลายทาง โดย Logmein เป็นโปรแกรมที่ดีมากและเป็นที่ยอมรับ เหตุผลที่เลือกโปรแกรม LogMeIn มาก็คือโปรแกรมนี้สามารถใช้ประโยชน์ได้หลากหลายรูปแบบอีกทั้งยังใช้งานได้ ง่าย สะดวกมากในเรื่องของการควบคุมคอมพิวเตอร์ระยะไกล

เมื่อก่อนนั้นการทำระบบ Remote Control ผ่าน Internet ก็คือ เราจะต้องรู้ว่าคอมพิวเตอร์ปลายทางของเราอยู่ที่ไหนในส่วนของ Internet (IP Address) โดยเราจะต้องเชื่อมต่อมันผ่านทาง Dynamic DNS และ Forward Port ซึ่งเป็นกระบวนการที่ยุ่งยากและซับซ้อนพอสมควรสำหรับ User ทั่วๆไป แต่โปรแกรม LogMeIn สามารถเข้าผ่าน server ของเว็บไซต์ โดยที่เราจะไม่จำเป็นต้องไปจัดการกับ Dynamic DNS และ Port Forward ต่างๆ
สาเหตุหลักๆที่ Logmein สามารถทำงานได้อย่างง่าย ก็เพราะการติดตั้งโปรแกรมของ Logmein เข้าไปในเครื่องจะทำให้เครื่องเราถูกลงทะเบียนกับทาง Server ของ Logmein ซึ่งทำให้ขั้นตอนการจดทะเบียน Dynamic DNS เพียงแค่เรา Login ผ่านเข้าไปในระบบของ Logmein

ส่วนเรื่อง Forward Port เราก็ไม่ต้องทำครับ เพราะทันทีที่ Logmein เชื่อมต่อกับทาง Server มันจะสร้าง Tunnel การติดต่อสื่อสารส่วนตัวระหว่างมันกับ Logmein Server ให้เองโดยอัตโนมัติ ทีนี้ เราเองก็ไม่ต้องไปยุ่งกับ Router เพื่อมาทำระบบ Forward Port ครับ
ผมขออธิบายโดยขั้นตอนการใช้งานโดยละเอียดเลย ละกันนะครับ ถ้ามีปัญหาสงสัยตรงไหน ทำการ Comment ไว้เดี๋ยวทางทีมงานจะเข้ามาตอบนะครับ โดยวิธีการนี้ให้ติดตั้งไว้ที่เครื่องปลายทางที่เราต้องการจะควบคุมก่อนที่ จะทำการควบคุมได้นะครับ
1. ขั้นแรกเลยให้ทำการเข้าไปยัง Website : www.logmein.com หรือเว็บต้นสังกัดนั่นเองครับ โดยเป็นแม่ข่ายหลักที่เราสามารถใช้งานทั้งหมดผ่านทางเว็บไซต์นี้
2. พอเข้ามาแล้วก็เลือก Create Account ที่ด้านขวามือ ตามรูปด้านล่างเลยครับ

3. หลังจากเลือกตามด้านบนแล้วก็จะเข้ามาในหน้า Account ให้เลือก Sign Up ที่ Logmein Free นะครับ

4. เสร็จทำการสมัครสมาชิก ตรงส่วน I plan to use Logmein ก็ให้เลือกเป็น Personal Use นะครับ

5. ต่อมาที่การสมัคร Step ที่ 2 ก็ไม่มีไรมากครับ กรอกชื่อ นามสกุลแล้วก็องค์กรของท่าน เสร็จแล้วกด Create Account ครับ

6. ต่อมาจะเป็นหน้า My Computers ให้กด Add Computer ครับ

7. แล้วทาง Logmein จะให้เราติดตั้ง Software โดยอัตโนมัติ สำหรับท่านที่เครื่องไม่ Download อัตโนมัติก็ให้เลือกกด Download เองได้นะครับ

8. พอกด Run แล้วก็รอซักพักนะครับ เพื่อทำการ Download โปรแกรม Logmein จากเว็บไซต์นี้นะครับ

9. สำหรับคนที่มีความเร็ว Internet สูงก็คงใช้เวลาไม่นาน ส่วนคนที่ Internet ไม่แรงก็รอซักพักครับ พอทำการ Download เสร็จ โปรแกรมจะทำการเริ่มติดตั้งอัตโนมัติ ขนาดประมาณ 10 MB ครับ

10. ให้กด Next ไปได้เลย ถัดมาก็เลือก Typical ครับ แล้วกด Next

11. ขั้นตอนถัดมาจะเป็นการตั้งชื่อ Computer ปลายทางที่เราต้องการใช้โปรแกรม Logmein ใส่ไว้ที่ช่อง Description ด้านล่างเลย เสร็จแล้วคลิก Next

12. ถัดมา เราจำเป็นจะต้องตั้ง Computer Access Code เหมือนเป็นรหัสเพื่อทำการ Login เข้าเครื่องคอมพิวเตอร์ที่เราต้องการจะเข้าไปควบคุม (จำไว้ด้วยนะครับ ถ้าลืมเดี๋ยวจะเข้าไปคุมไม่ได้)

13. หลังจากคลิก Next โปรแกรมจะเริ่มทำการติดตั้ง ดังภาพด้านล่าง

14. รอซักพักประมาณ 2-3 นาที ก็จะเสร็จเรียบร้อย

15. พอติดตั้งเสร็จสมบูรณ์แล้วก็จะกลับมาที่หน้านี้บนเว็บไซต์ ท่านสามารถเลือกทดลองใช้แบบ IT-Tech ได้นะครับ แต่ว่าจะเป็นแบบ Trail Version คือต้องเสียเงิน โดยสามารถ Edit ได้ที่ Settings ปกติจะมีแบบ Free กับ IT-Tech แบบฟรีก็จะไม่มีลูกเล่นอะไรเลย ไว้ใช้ควบคุมอย่างเดียว

16. ให้เลือกที่ชื่อคอมพิวเตอร์ของท่านเลยนะครับ ระบบจะทำการ Connecting ดังภาพ

17. รอโหลดซักพัก บางเครื่องอาจจะจำเป็นต้อง Install Active X สำหรับ Internet Explorer ซึ่งจะขึ้นมาอัตโนมัติส่วน Firefox จะเป็น Plug-In Logmein หลังจากนั้นจะเป็นหน้าของการใส่ Computer Access Code เพื่อเข้าสู้คอมพิวเตอร์ที่เราต้องการจะทำการควบคุมระยะไกล เสร็จแล้วกด Login

18. หน้าถัดมาจะพบกับหน้าที่พร้อมที่จะ Connect ไปยังคอมพิวเตอร์ ให้เลือกที่ Remote Control โดยจะ Run ผ่าน Web Browser หากต้องการให้แสดงบนหน้าต่างใหม่ก็ให้ติกในช่อง Open remote control in a new window

19. หลังจากนั้นรอการ Activate ซักครู่ ในการเชื่อมต่อ เสร็จแล้วก็กด Continue ครับ

20. เป็นอันเสร็จสิ้น หน้าตาประมาณนี้ครับ

โดยวิธีการนี้ให้ติดตั้งไว้ที่เครื่อง ปลายทางที่เราต้องการจะควบคุมก่อนที่จะทำการควบคุมได้นะครับ เครื่องปลายทางจะต้องมีโปรแกรม Logmein ที่เป็น Enabled ที่มุมขวาล่าง ถ้าไม่ต้องการให้เมาควบคุมก็สามารถตั้งเป็น Disabled ได้ครับ โดยการทำการคลิกขวาที่ไอคอนด้านล่างแล้วตั้งค่า ส่วนเครื่องที่ควบคุมจะมีโปรแกรมหรือไม่มีก็ได้นะครับ เพราะสามารถควบคุมผ่าน Web Browser ได้เลย

ก็ผมบอกไว้เลยละกัน โปรแกรมนี้เป็นโปรแกรมที่สามารถเจาะผ่านระบบความปลอดภัยจากทาง Windows ได้เลยโดยที่ไม่ต้องขอ เพราะฉะนั้นกรุณาใช้ทางที่ดีหรือถูกต้องนะครับ เพราะโปรแกรมนี้เหมือนดาบสองคม เหมือนกับโปรแกรมเจาะระบบที่สามารถทำได้ทุกอย่าง ถ้าใช้ในทางที่ถูกก็จะเกิดประโยชน์อย่างมากเลย แนะนำให้ใช้กันในทางที่ดีนะครับ แล้วจะได้พบกันอีกกับ Tip ดีๆอันหน้าครับ ขอบคุณครับ
การ Remote Desktop ผ่าน MSN Messenger ถือว่าเป็นอีกวิธ๊ง่ายๆ แต่ได้ผลดี และคงถูกใจคอเอ็มทั้งหลาย ประโยชน์ของมันใช้สำหรับไว้แก้ปัญหาคอมฯอีกเครื่องที่ออนเอ็มอยู่ โดยไม่ต้องไปทำที่เครื่องนั้นโดยตรง
สึ่งที่ต้องมีในการทำ
1 อินเทอร์เน็ต
2 Msn ถ้าจะดีขอเวอร์ชั่นล่าสุดทั้งคู่ ( เวอร์ชั่น 9 ก็สามารถใช้งานได้)
3 Window ไม่ต้องเหมือนกันเหมือนกันทั่งคู่(ได้แค่XPกับVista)
4 ยอมรับการ Remote Desktop
5 ใช้อย่างสร้างสรรค์
ขั้นแรกเครื่องที่จะถูก Remote ต้องตั้งค่าให้ยอมรับการ Remote ครับก่อนโดยคลิกขวาที่ My Computer >> แล้วเลือก Properties >> แล้วเลือกที่ Remote >> และสุดท้ายติ๊กถูกที่ช่อง Allow ดังรูป

ขั้นตอนและวิธีการทำ
ผม ขอเรียกคอมฯที่จะถูกควบคุมว่า Com A และเรียกคอมที่ควบคุมบังคับเมาส์ว่า Com B เพื่อที่จะได้เข้าใจง่ายๆ
1. พูดคุยกันใน Msn ให้ Com A คลิกที่ รูปเพลง ข้างๆ ไพร่ และ โทรศัพท์ ดังรูปครับ แล้วไปยังที่ รูปเมาส์ Request Remote Assistance ดังรูป หรือคลิก Actions >> แล้วเลือก Request Remote Assistance

2. เมื่อทำตามขั้นตอนที่ 1 แล้ว ก็จะมีให้เลือกบล๊อกโชว์ที่ Com B ให้กด accept แล้วรอสักครู่

3. Com A ก็จะมีให้ขึ้นว่า ต้องการให้ Com B ดูหน้าจอของเราไหม ก็กดตกลงไป เพื่อที่ Com B จะสามารถดูหน้าจอได้ เมื่อ Com A ตอบ Yes แล้ว มาถึงตอนนี้ Com B สามารถเห็น จอของนาย A แล้วครับดังภาพ

4. เมื่อ Com B ต้องการที่จะควบคุม Com A ก็กดที่ซ้ายบนตรง Take Control แล้ว Com A ก็จะขึ้น ให้ตอบตกลงครับ แล้วมีเขียนว่า ถ้าต้องการ หยุดการควบคุม สามารถกด Esc หยุดได้ครับ เมื่อตอบตกลงแล้ว Com B ก็สามารถที่จะควบคุม Com A ได้ครับโดยที่ Com A ก็ยังสามารถเล่นได้อยู่ แต่ถ้าจะให้ Com B ทำอะไรก็ต้องอยู่นิ่งๆครับ เป็นอันจบสมบูรณ์ครับ

เครตดิต : HackKingSoft ,link
สึ่งที่ต้องมีในการทำ
1 อินเทอร์เน็ต
2 Msn ถ้าจะดีขอเวอร์ชั่นล่าสุดทั้งคู่ ( เวอร์ชั่น 9 ก็สามารถใช้งานได้)
3 Window ไม่ต้องเหมือนกันเหมือนกันทั่งคู่(ได้แค่XPกับVista)
4 ยอมรับการ Remote Desktop
5 ใช้อย่างสร้างสรรค์
ขั้นแรกเครื่องที่จะถูก Remote ต้องตั้งค่าให้ยอมรับการ Remote ครับก่อนโดยคลิกขวาที่ My Computer >> แล้วเลือก Properties >> แล้วเลือกที่ Remote >> และสุดท้ายติ๊กถูกที่ช่อง Allow ดังรูป
ขั้นตอนและวิธีการทำ
ผม ขอเรียกคอมฯที่จะถูกควบคุมว่า Com A และเรียกคอมที่ควบคุมบังคับเมาส์ว่า Com B เพื่อที่จะได้เข้าใจง่ายๆ
1. พูดคุยกันใน Msn ให้ Com A คลิกที่ รูปเพลง ข้างๆ ไพร่ และ โทรศัพท์ ดังรูปครับ แล้วไปยังที่ รูปเมาส์ Request Remote Assistance ดังรูป หรือคลิก Actions >> แล้วเลือก Request Remote Assistance
2. เมื่อทำตามขั้นตอนที่ 1 แล้ว ก็จะมีให้เลือกบล๊อกโชว์ที่ Com B ให้กด accept แล้วรอสักครู่
3. Com A ก็จะมีให้ขึ้นว่า ต้องการให้ Com B ดูหน้าจอของเราไหม ก็กดตกลงไป เพื่อที่ Com B จะสามารถดูหน้าจอได้ เมื่อ Com A ตอบ Yes แล้ว มาถึงตอนนี้ Com B สามารถเห็น จอของนาย A แล้วครับดังภาพ
4. เมื่อ Com B ต้องการที่จะควบคุม Com A ก็กดที่ซ้ายบนตรง Take Control แล้ว Com A ก็จะขึ้น ให้ตอบตกลงครับ แล้วมีเขียนว่า ถ้าต้องการ หยุดการควบคุม สามารถกด Esc หยุดได้ครับ เมื่อตอบตกลงแล้ว Com B ก็สามารถที่จะควบคุม Com A ได้ครับโดยที่ Com A ก็ยังสามารถเล่นได้อยู่ แต่ถ้าจะให้ Com B ทำอะไรก็ต้องอยู่นิ่งๆครับ เป็นอันจบสมบูรณ์ครับ
เครตดิต : HackKingSoft ,link
imp user/pass file=filename.dmp full=y ignore=y
การ Import Export ข้อมูลด้วย Data Pump ใน oracle database 10g
การ Import Export ข้อมูลด้วย Data Pump ใน oracle database 10g
การ tunneling VNC ผ่าน Putty
ทำ SSH Tunneling โดยใช้ Putty
เพิ่มความปลอดภัยให้ VNC Remote Desktop ด้วย PuTTY SSH Tunneling
SSH Public Key Authen พอกันทีกับการพิมพ์รหัสเข้า SSH
ทำ SSH Tunneling โดยใช้ Putty
เพิ่มความปลอดภัยให้ VNC Remote Desktop ด้วย PuTTY SSH Tunneling
SSH Public Key Authen พอกันทีกับการพิมพ์รหัสเข้า SSH
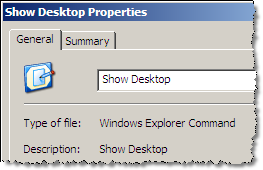 The Show Desktop Icon is not a standard program shortcut but a Windows explorer command file written in plain text.
If you have accidently deleted the Show Desktop Icons, here're the steps involved to recreate it:
Step 1: Open a new notepad file and type the following text:
[Shell]
Command=2
IconFile=explorer.exe,3
[Taskbar]
Command=ToggleDesktop
Step 2: Save this file as "Show Desktop.scf" - remember to use the quotes else notepad may save it with a .txt extension.Command=2
IconFile=explorer.exe,3
[Taskbar]
Command=ToggleDesktop
Step 3: Use the mouse to drag the Show Desktop.scf icon to the Quick Launch toolbar or another location where you want the shortcut to appear.
Alternatively, you can press the Win+D shortcut key for Show Desktop. It's much the same as Win+M which will minimize all the open windows to the task bar.
Windows that don't have a minimize button are minimized using Win+D but not with Win+M.
เจอ Error ตอนเรียก datasource ประมาณนี้
FreePool E J2CA0045E: Connection not available while invoking method createOrWaitForConnection for resource jdbc/xxx
ibm บอกวิธีแก้ไว้ http://www-01.ibm.com/support/docview.wss?rs=180&uid=swg21217062
ส่วนวิธีที่ใ้ช้แก้คือไปเพิ่ม max connetion ของ datasource ใน websphere (default = 10)
FreePool E J2CA0045E: Connection not available while invoking method createOrWaitForConnection for resource jdbc/xxx
ibm บอกวิธีแก้ไว้ http://www-01.ibm.com/support/docview.wss?rs=180&uid=swg21217062
ส่วนวิธีที่ใ้ช้แก้คือไปเพิ่ม max connetion ของ datasource ใน websphere (default = 10)
เคยมั้ยครับ เข้าเว็บแล้ว โอ้ว ทำไมเว็บนี้ถึงสวย ถึงมีลูกเล่นอย่างนี้
ถ้าเราอยากรู้ก็ต้อง ดู source code กันล่ะ
แต่เรามีวิธีแนะนำ ที่ง่ายกว่านั้น
ใช้ Wappalyzer ซึ่งเป็น add-on ของ firefox ที่จะช่วยให้รู้ว่า เว็บที่เราใช้งานทำด้วย cms ตัวไหน

Link : Homepage , Download add-on
ถ้าเราอยากรู้ก็ต้อง ดู source code กันล่ะ
แต่เรามีวิธีแนะนำ ที่ง่ายกว่านั้น
ใช้ Wappalyzer ซึ่งเป็น add-on ของ firefox ที่จะช่วยให้รู้ว่า เว็บที่เราใช้งานทำด้วย cms ตัวไหน
Identify software on the websites you visit
Wappalyzer is an add-on for Firefox that uncovers the technologies used on websites. It detects CMS and e-commerce systems, message boards, JavaScript frameworks, hosting panels, analytics tools and more.
Link : Homepage , Download add-on
// Read properties file.
Properties properties = new Properties();
try {
properties.load(new FileInputStream("filename.properties"));
} catch (IOException e) { }
// Write properties file.
try {
properties.store(new FileOutputStream("filename.properties"), null);
} catch (IOException e) { }
To read java properties files from the classpath:
The properties files can be stored in the classpath. This way they can be put inside jar files and it’s really useful for web applications when the absolute location of the properties files is not known. When I tested this in an web application it didn’t work:
Properties properties = new Properties() ;
URL url =  ClassLoader.getSystemResource("test.properties");
properties.load(new FileInputStream(new File(url.getFile())));
To read java properties files from the classpath in a web application:
The following example works to load the properties files in a web application. This snippet was tested on Tomcat 5.5. The ‘/’ represents the root of the class path. Otherwise the properties file location is considered relatively to “this” class (or to MyClass for the second example):
Properties properties = new Properties() ;
properties.load(this.getClass().getResourceAsStream("/seoimproved.properties"));
Similar example to use in a static context:
Properties properties = new Properties() ;
properties.load(MyClass.class.getResourceAsStream("/seoimproved.properties"));
To read java properties files from a specific location:
The properties files can be loaded from any location.
Properties properties = new Properties() ;
properties.load(new FileInputStream("C:\\tmp\\test.properties"));
In the J2EE application you can trust the class loader to find the properties file under this directory. For this you should code your application as:
or
String propFile = "propConfig.properties";
URL url = Thread.currentThread().getContextClassLoader().getResource(propFile);
Properties prop = new Properties();
prop.load( url.openStream() );
or
Properties prop = new Properties();
try
{
prop.load(Thread.currentThread().getContextClassLoader().getResourceAsStream("hello.properties"));
}
catch (FileNotFoundException e)
{
e.printStackTrace();
}
catch (IOException e)
{
e.printStackTrace();
}
สมัครสมาชิก:
บทความ (Atom)